Excel converts MIN numbers to strange format
Cause: Microsoft Excel may automatically apply a built-in number format to the cell, based on the characteristics of the number.
- Open Excel and open the file in Excel. Do not click the file to open in Excel.
- The import wizard will give you the opportunity to change the MIN number column to a text format. Select the MIN range of cells, and then click Cells on the Format menu.
- Click the Number tab.
- Click Text, and then click OK.
eRAMP fully supports importing a text file (comma separated value file (CSV), but there may be times when you want to convert a TXT or CSV file of loan records with the MERS MIN number into an Excel spreadsheet (XLS or XLSX) first. Using an Excel spreadsheet makes it much easier to read and work with your data if you need to make edits before you import it, especially if your loan transaction list is on the larger side.
Differences Between TXT, CSV, and XLS File Types
Text files, CSV files, and Excel spreadsheets are great ways to store data, depending on your need:
- Text File (TXT) - Text files contain plain text and are commonly created with NotePad (PC) or other text editor porgrams. If you paste content into a text file, all the styles and formatting are stripped out, leaving you with plain text. This makes it easy to copy and paste data without formatting issues. If you paste spreadsheet data in to a TXT file, it's separated by tabbed spaces.
- Comma Separated Value File (CSV) - A CSV file also contains plain text and is versatile because it can be opened on any operating system, in any text editor, and also in spreadsheet applications, like Excel. If you paste spreadsheet data in to a CSV file, it's separated by commas.
- Excel Spreadsheet (XLS) - Excel spreadsheets can only be opened by other spreadsheet applications, like Google Sheets or OpenOffice Calc, but they have lots of formatting options, ways to calculate data through functions, and ways to present data visually through charts and tables. Information pasted into a spreadsheet is separated into cells, rows, and columns.
Take a look at the examples below to see how the same information is displayed in a text file, CSV file, and Excel spreadsheet:
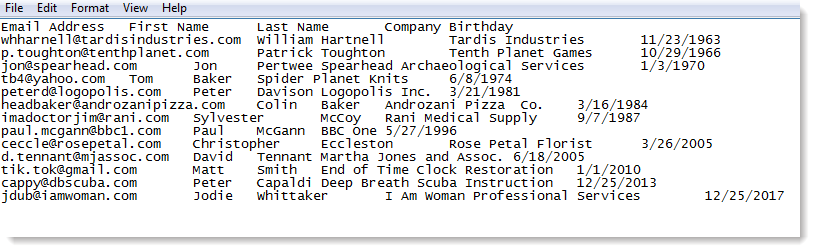
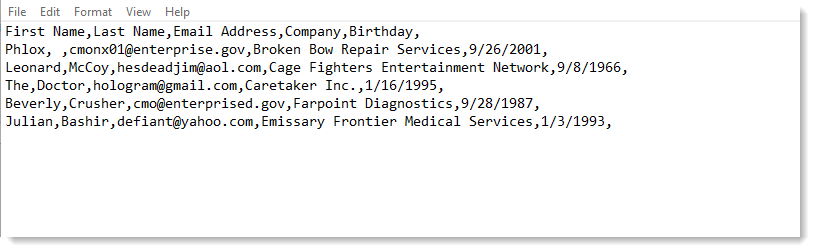
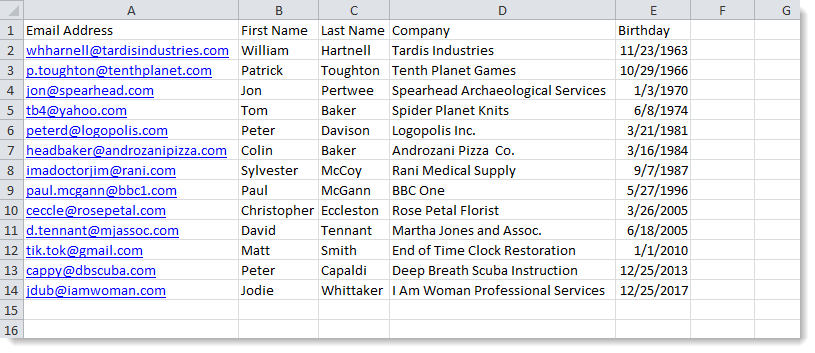
| Example of Text File of Contact Information | Example of a CSV File of Contact Information | Example of an Excel File of Contact Information |
 |  |  |
Steps to Convert Content from a TXT or CSV File into Excel
The steps to import a TXT or CSV file into Excel are similar for Excel 2007, 2010, 2013, and 2016:
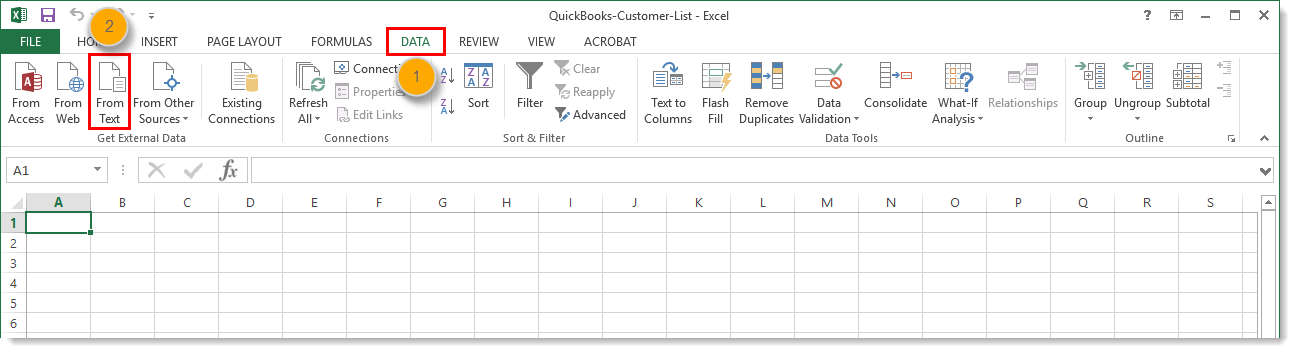
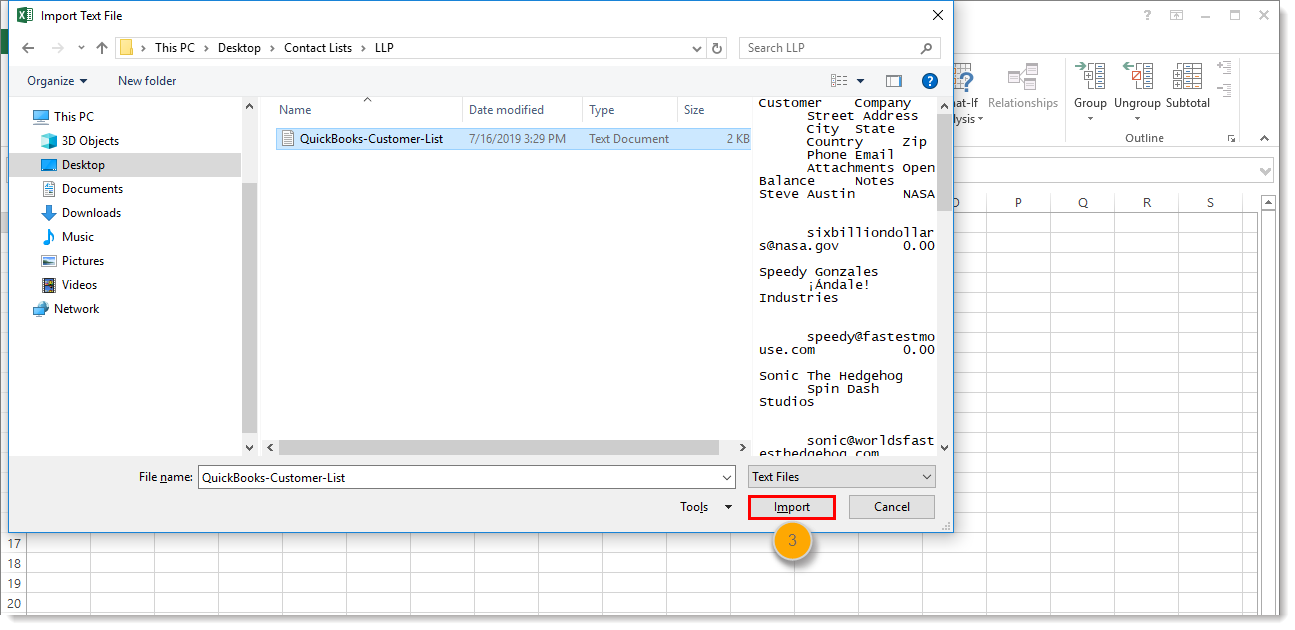
- Open the Excel spreadsheet where you want to save the data and click the Data tab.
- In the Get External Data group, click From Text.
- Select the TXT or CSV file you want to convert and click Import.
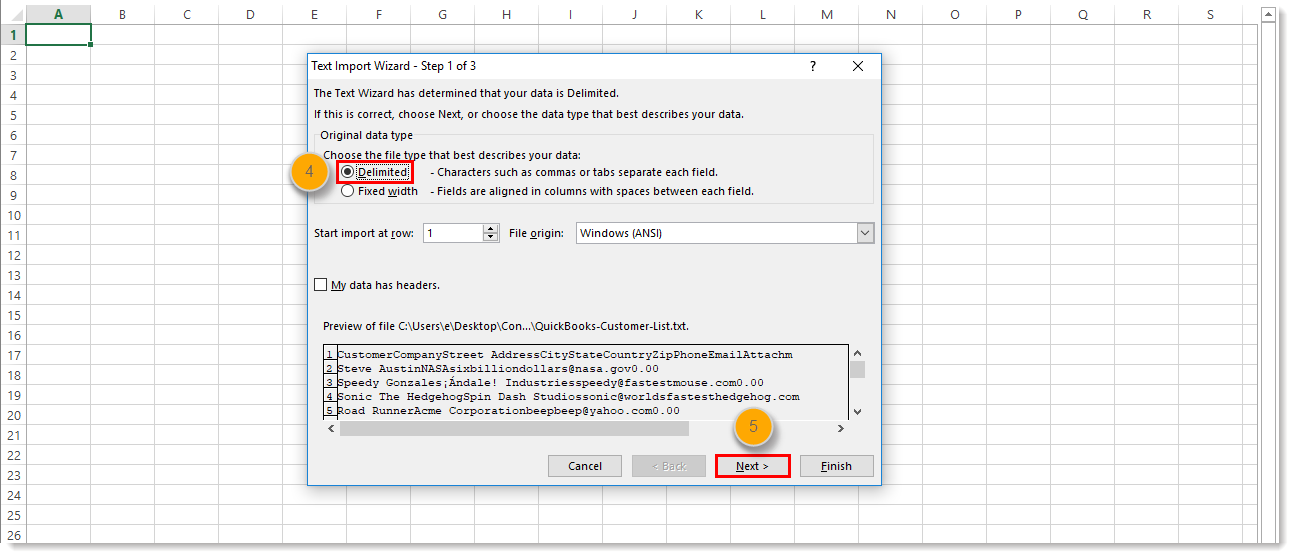
- Select "Delimited". A delimiter is just a fancy way of saying that your TXT file uses tabs or your CSV file uses commas to separate and group your data.
- Click Next.
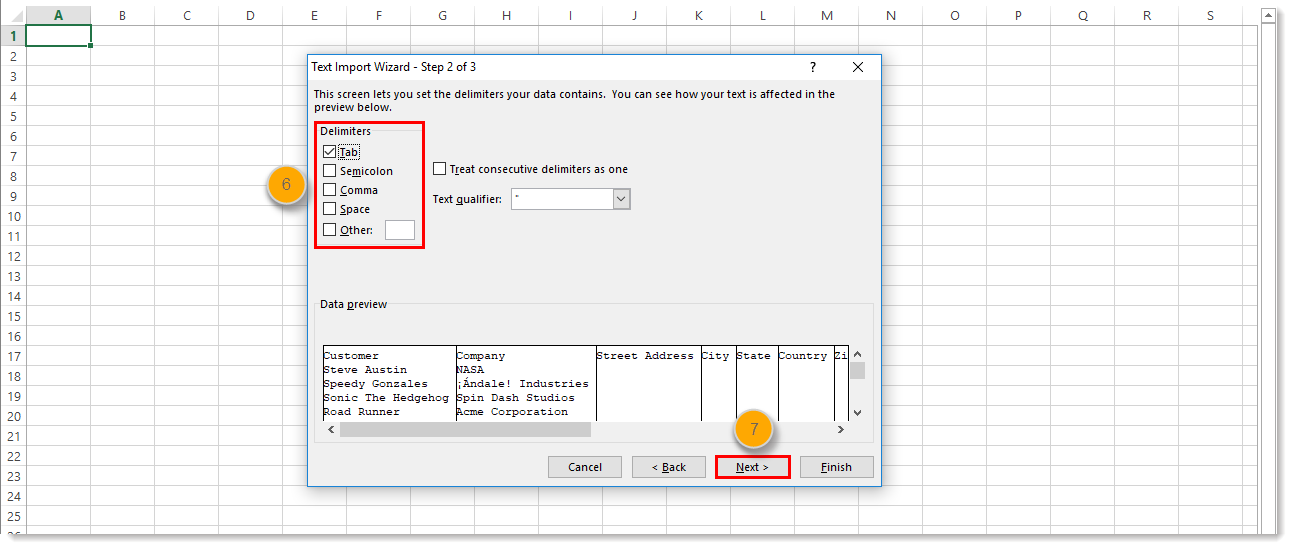
- Select the delimiter that groups your data into individual columns in the Data preview field. Typically you want to select "Tab" when converting a TXT file, and "Comma" when converting a CSV file.
Note: If you select "Space" it can sometimes split a single column into multiple columns if the column header text has multiple words. For example, a "First Name" column becomes a "First" column and a "Name" column. Look carefully at the Data preview to make sure your data is aligned with the intended column header! - Click Next.
- Select "General".
- Click Finish.

- Choose "Existing Worksheet".
- Add "=$A$1" to the field. This ensures your data begins in the Row 1, Column A cell of the spreadsheet. If there are any blank rows in the spreadsheet above your data, it can cause a file import error.
- Click OK.

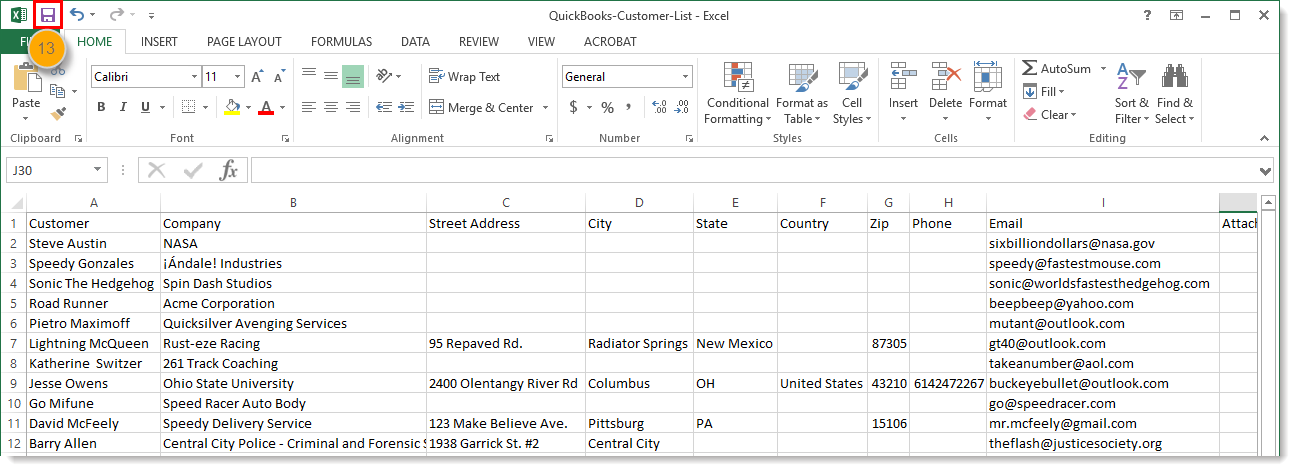
- Click Save.
Need more help using Excel? Please see Microsoft's Support.
Related Articles
Duplicate MIN Numbers being registered for one loan
Issue: After setting up a new user for eRAMP duplicate MIN numbers for the same property were being registered. Solution: When new user was set up the Registration Template the MIN Number Field was set to Generate MIN Numbers. Each time the new user ...Importing Duplicate MIN Numbers
In some cases users would like to create an import file from their LOS system based on loans that may or may not have been imported into eRAMP. Most of the time this is to pickup loans that may have been missed as part of a previous export. There is ...MIN Already Registered
Applies to: MINGenerator Problem: We're receiving an error MIN Already Registered. Cause: The loan trying to be registered has already been registered. MERs will not allow a loan to be submitted for registration twice. eRAMP registration has built in ...Correct Batch Status or Correct status of MIN
Problem 1: a MIN is in eRAMP as rejected but MERS shows the MIN as accepted. I want to change the status and make the MIN move to the Transfer of Rights screen. Problem 2: a MIN is in eRAMP as rejected but MERS shows the MIN as accepted. I want to ...Registration error not a valid MIN or (1) cases does not have MIN number
Problem: When I import loans into 102 Registration I receive an error in import loan count our I receive an error that MIN number is not valid or (1) cases does not have MIN Number. Cause: Your import file has at least one header row that eRAMP is ...